

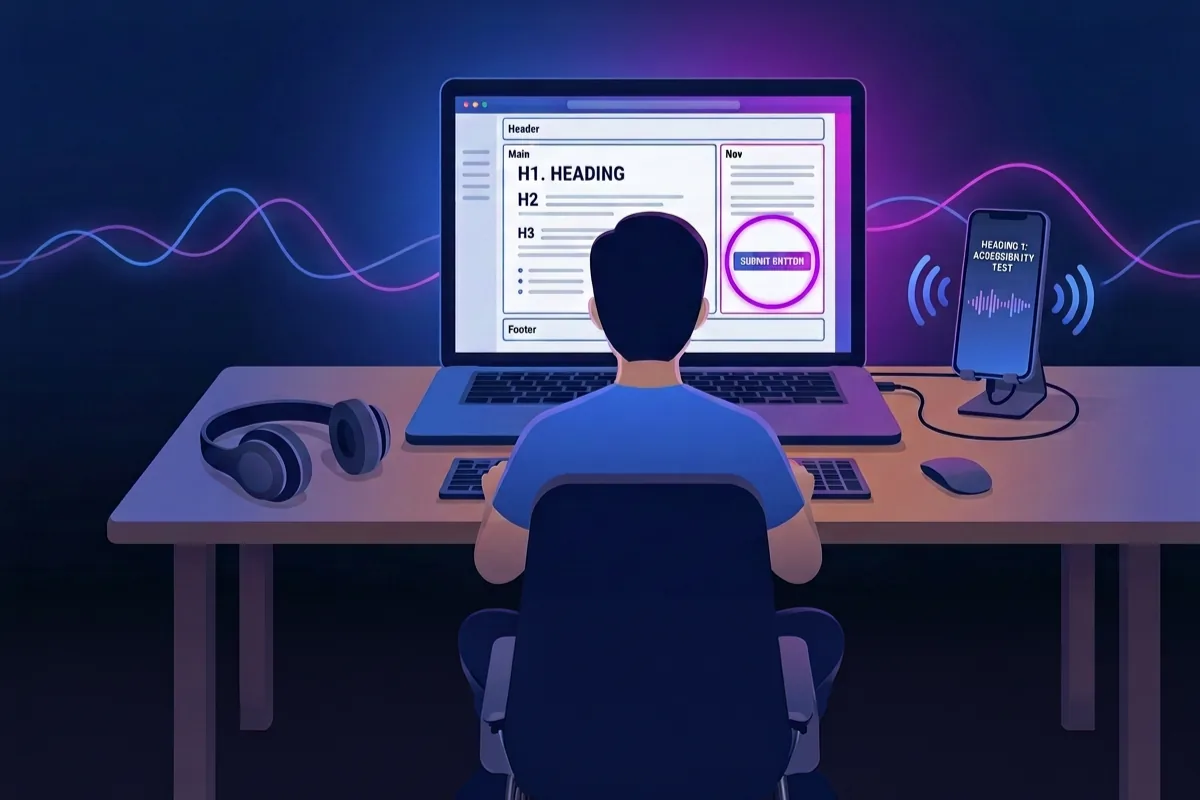
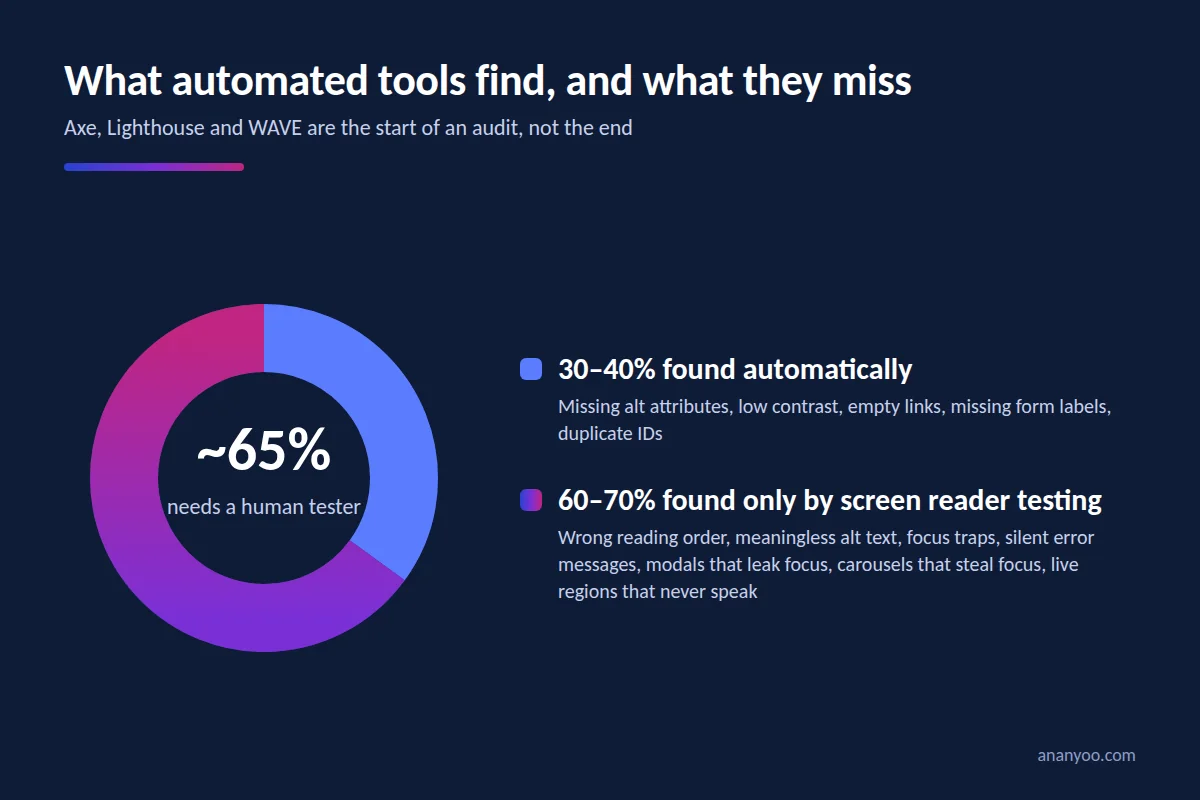
Automated tools like Axe, Lighthouse and WAVE are very useful, and I run them on every project. But they can only find around 30 to 40 percent of accessibility problems. The rest can be found only through screen reader testing, where a real person sits with a screen reader and tries to use the website the way a blind or low-vision user would use it. This is the part of an audit that many developers skip, and it is the part that decides whether a website is truly usable or only "technically compliant".
In this article I am sharing the exact screen reader testing method I follow with four screen readers: JAWS and NVDA on Windows, VoiceOver on iPhone and TalkBack on Android. This is not theory. It is the routine I have been following for years while auditing sites for clients and while building my own accessible WordPress themes and plugins.
Table of Contents
Why screen reader testing needs more than one screen reader
Every screen reader has its own way of reading a page. JAWS and NVDA both work with Chrome and Firefox, but they announce form fields, tables and ARIA roles slightly differently. VoiceOver on iOS is touch based and depends heavily on swipe gestures. TalkBack on Android has its own reading order rules and sometimes handles custom widgets in a different manner.
If you do screen reader testing with only one tool, you will pass your own test and still get complaints from real users. Testing with at least one Windows screen reader and both mobile screen readers gives a very balanced picture. In my experience, NVDA and VoiceOver together catch most issues, and JAWS and TalkBack confirm them and add a few more.
Before you start: set up a clean testing environment
A few small preparations save a lot of time later.
First, test in a fresh browser profile without any extensions. Ad blockers, password managers and even some "accessibility overlay" plugins change how the page is announced.
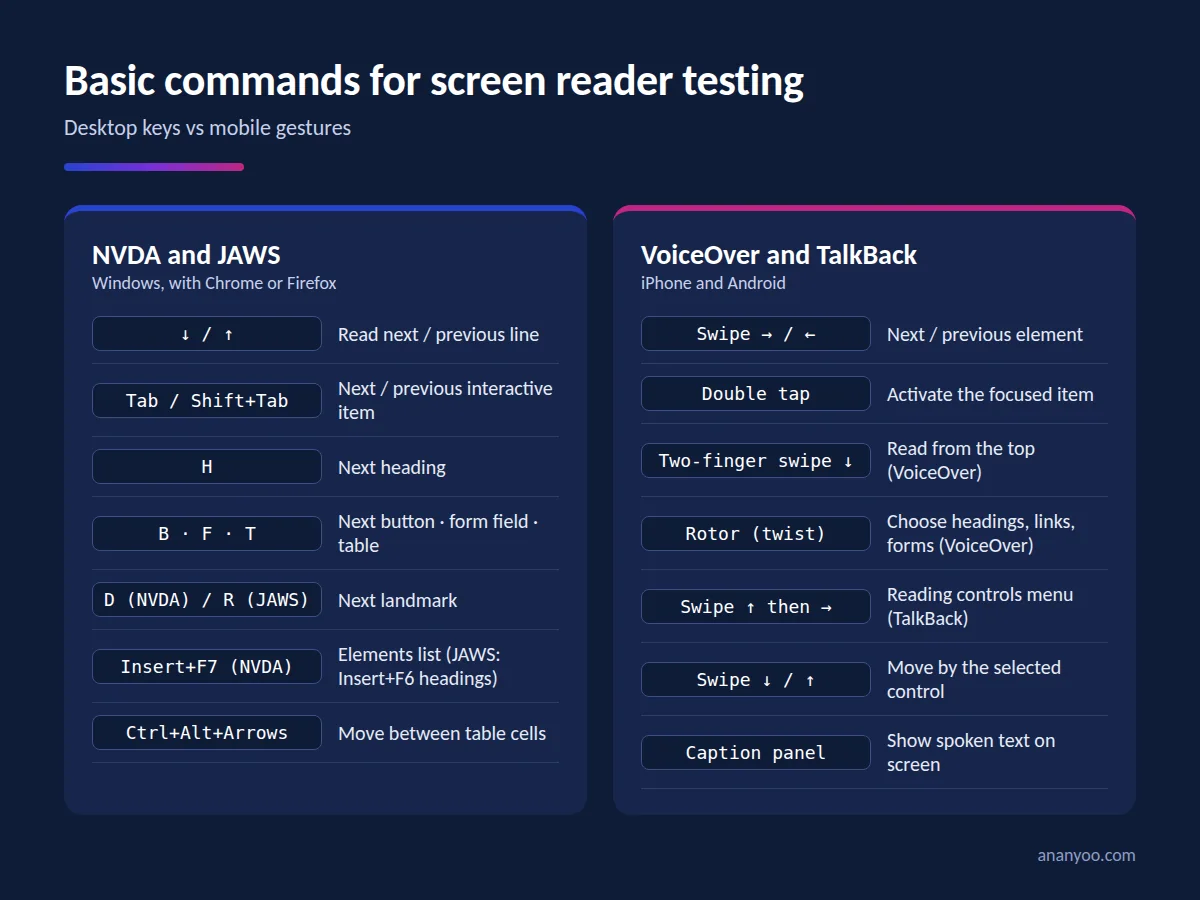
Second, learn the basic keys. For NVDA and JAWS, the most important ones are the arrow keys for reading line by line, Tab for moving between interactive items, H for jumping to headings, B for buttons, F for form fields, T for tables and Insert+F7 (NVDA) or Insert+F6 (JAWS headings list) to open element lists. On iPhone, VoiceOver uses swipe right and left to move, double tap to activate, and the rotor (two-finger twist) to change what you are navigating by. On Android, TalkBack uses similar swipes, and the reading controls menu is opened by swiping up then right, or by three-finger tap depending on the version.
Third, switch off your monitor, or at least turn your chair away from it, for part of the test. This sounds odd but it is the most honest way to know whether the website makes sense through sound alone.
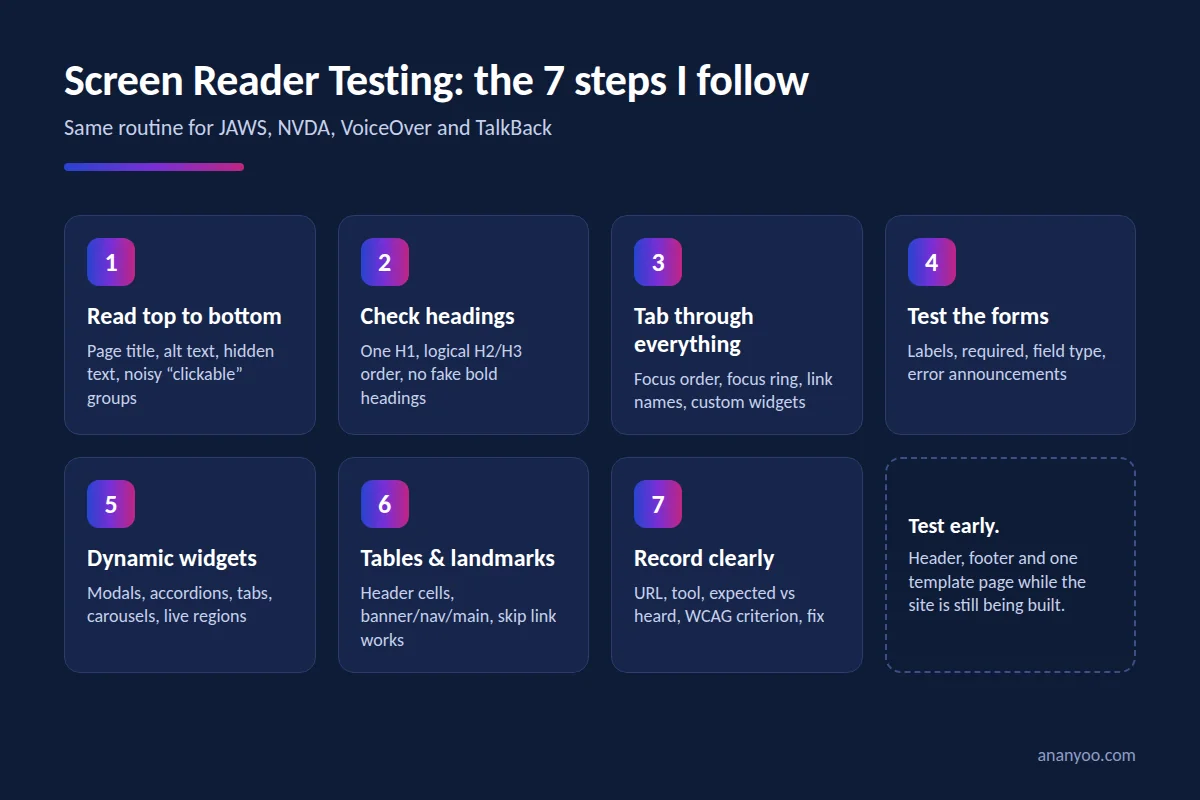
Step 1: Read the page from top to bottom
I start every screen reader testing session by placing the cursor at the top of the page and reading with the down arrow (NVDA and JAWS) or by continuous reading (two-finger swipe down in VoiceOver, or the "read from top" option in TalkBack). I am listening for a few things:
- Does the page title make sense and does it come first?
- Are images described in a meaningful way, or do I hear file names like "IMG_2041.jpg"?
- Are decorative images silent, as they should be?
- Is there any text that is visible on screen but never announced? This usually means content is hidden inside CSS background images or is placed in an element with
aria-hidden="true"by mistake. - Do I hear "clickable" or "group" repeated many times? That is a sign of poorly structured divs with click handlers.
Step 2: Check the heading structure

Next in my screen reader testing routine, I press H repeatedly, or open the headings list. A good page reads like a book index: one H1 for the page name, H2 for major sections, H3 for sub-sections. If the headings jump from H1 to H4, or if bold text is used instead of real headings, a screen reader user cannot skim the page. On mobile I set the rotor or reading control to "Headings" and swipe down to do the same check.
Step 3: Tab through every interactive element
Now I put the arrow keys aside and use only Tab and Shift+Tab. Every link, button, form field, menu and slider must receive focus in a logical order, and I must be able to hear what it is and what it does. Common failures I find during this part of screen reader testing:
- Focus disappears into an invisible element, such as a closed mobile menu that is still in the tab order.
- A link is announced as just "Read more" or "Click here" with no context.
- Custom dropdowns built with divs do not receive focus at all.
- The keyboard focus ring is removed with
outline: nonein CSS, so sighted keyboard users are lost even though the screen reader is fine.
On mobile, I do this same check by swiping right through the page element by element. VoiceOver and TalkBack will read each element in sequence, and I make sure that no button is skipped and nothing is announced twice.
Step 4: Test the forms properly
Forms are where most websites fail in screen reader testing. I fill every form using only the screen reader. For each field I check that the label is announced together with the field, that required fields say "required", that the field type is correct (a phone field should bring up a number keypad on mobile), and that instructions such as date formats are read before I start typing, not after.
Then I submit the form with errors on purpose. The screen reader must announce that there are errors, tell me which fields have problems, and move my focus to the first error or to an error summary. If the page simply shows a red border and stays silent, that is a fail under WCAG success criterion 3.3.1 Error Identification.
Step 5: Test dynamic content and custom widgets
Modern websites have carousels, accordions, modal dialogs, tabs and live search suggestions. These need special attention during screen reader testing.
For a modal dialog, I check that focus moves inside the dialog when it opens, that Tab does not escape to the page behind it, that Escape closes it, and that focus returns to the button that opened it. For an accordion, the button must announce "expanded" or "collapsed". For tabs, the arrow keys should move between tabs and the selected tab should be announced as "selected". For a carousel, there must be a pause button, and slide changes should not steal focus.
Live regions are another common trouble spot. When a "Item added to cart" message appears, I should hear it without moving my cursor. If I hear nothing, the message needs aria-live="polite" or a role of "status". I built my own Accessible Carousel plugin for WordPress exactly because so many popular sliders fail these checks, and screen reader testing with all four tools was the biggest part of the development work.
Step 6: Tables, landmarks and skip links
For data tables, screen reader testing means pressing T to jump to the table and then Ctrl+Alt+arrow keys (NVDA and JAWS) to move between cells. Column and row headers should be announced with each cell. On mobile, I check that the table is not simply read as one long paragraph.
I also press D (NVDA) or R (JAWS) to move between landmarks. A well-built page has a banner, navigation, main and contentinfo landmark. Finally, I reload the page and press Tab once. The very first item should be a "Skip to main content" link that actually works.
Step 7: Record everything in a clear way
A screen reader testing report is only useful if a developer can act on it. For every issue I note the page URL, the screen reader and browser used, what I expected to hear, what I actually heard, the WCAG success criterion it fails, and a suggested fix with a short code example. I also mark the severity. A missing alt attribute on a logo is minor; a checkout button that cannot be reached by keyboard is critical and blocks the whole purchase.
Habits that make screen reader testing faster
Keep the NVDA speech viewer open (Tools menu) so you can read each announcement as text while you learn. On iPhone, enable the VoiceOver caption panel, and on Android use TalkBack's "Display speech output" option, for the same purpose.
And most importantly, test early. Fixing a finished website is expensive. Screen reader testing of the header, footer and one template page while the site is still being built saves a lot of rework.
Final thoughts on screen reader testing
Screen reader testing is not a checkbox activity. It is the closest a sighted developer can come to experiencing the website as a blind user does. Automated tools tell you what is wrong with the code. Screen readers tell you what is wrong with the experience. Both are needed, but only the second one tells you whether a real person can actually complete their task.
If you would like to see how this method works on a real project, I have documented a full audit and remediation in my web accessibility case study. And if you are building on WordPress, my Ariade accessible theme and accessibility plugins have been tested with every method described in this article.
